Englund Gambit ...d6 and ...f6 lines
Following 1.d4 e5 2.dxe5, Black can try to open lines up immediately with 2...d6, 2...f6, or 2...Nc6 intending a subsequent ...f7-f6. The aim is to get partial compensation for a pawn and practical chances, striving for a quick attack on the white king. This approach can work well in practice, especially at fast time limits, but on the other hand, with accurate play White should be able to secure a large plus.
The Blackburne-Hartlaub Gambit: 2...d6
The idea of this line is that after 3.exd6 Bxd6 Black gets a slight lead in development and open lines. A common plan is to castle on the opposite side of the board to White, encouraging an attacking race, and argue that due to the open lines and development, Black's attack should be slightly faster than White's. Although White is objectively better after 3.exd6, Black's score in practice is pretty good.
More tricky for Black to deal with is 3.Nf3, since if 3...dxe5?! 4.Qxd8+ Kxd8 5.Nxe5 White keeps the extra pawn. Black generally continues with 3...Bg4, envisaging a pin on the f3-knight after White's e4-pawn moves. 4.Bg5 then disrupts Black's natural development plans, e.g. 4...Qd7 5.exd6 Bxd6 6.Nc3 and Black will find it difficult to castle queenside with White's g5-bishop pointing at d8. But perhaps best of all for White is 4.e4, transposing to a dubious line of the Philidor Defence (1.e4 e5 2.Nf3 d6 3.d4 Bg4 4.dxe5). After 4...Nd7 (4...Bxf3 5.Qxf3 is very good for White) 5.exd6 Bxd6 6.Nc3, I don't think much of Black's compensation.
More tricky for Black to deal with is 3.Nf3, since if 3...dxe5?! 4.Qxd8+ Kxd8 5.Nxe5 White keeps the extra pawn. Black generally continues with 3...Bg4, envisaging a pin on the f3-knight after White's e4-pawn moves. 4.Bg5 then disrupts Black's natural development plans, e.g. 4...Qd7 5.exd6 Bxd6 6.Nc3 and Black will find it difficult to castle queenside with White's g5-bishop pointing at d8. But perhaps best of all for White is 4.e4, transposing to a dubious line of the Philidor Defence (1.e4 e5 2.Nf3 d6 3.d4 Bg4 4.dxe5). After 4...Nd7 (4...Bxf3 5.Qxf3 is very good for White) 5.exd6 Bxd6 6.Nc3, I don't think much of Black's compensation.
The Soller Gambit (2...Nc6 3.Nf3 f6) and related approaches
This is a reversed Blackmar-Diemer Gambit with a tempo less, but nonetheless Black does tend to get about half a pawn's worth of compensation if White takes on f6, and in rapid games Black's attacking chances are quite dangerous. If 4.exf6 Nxf6 5.Bg5 (recommended by Gary Lane) then Black gets some attacking chances after 5...h6, and if 5.Bf4 Bd6.
The main problem for Black is rather 4.e4, returning the pawn in order to get a development advantage and good chances of taking advantage of Black's weakened kingside. Following 4...fxe5 5.Bc4, White can then follow up with Nf3-g5, tying Black up to the defence of f7.
A related idea is the Felbecker Gambit, 3...Bc5, whereupon White's best continuation is probably 4.Nc3, with the idea of following up with Nc3-e4 in most cases, and meeting ...f7-f6 with e2-e4. If 4.e4 then Black can change plans with 4...Nge7 and have just a modest disadvantage.
White's alternatives to 2...Nc6 3.Nf3
3.Nf3 appears to be White's strongest move in the position, but White can also consider transposing into a line of the Nimzowitsch Defence with 3.e4 (1.e4 Nc6 2.d4 e5 3.dxe5). 3.f4 should be met by 3...d6, rather than 3...f6 which is met by 4.Nf3, and Black gets enough compensation for a pawn. 3.Bf4 is the other challenging option, which can be met by 3...f6, 3...Qe7 or 3...Nge7, but Black also has the independent line 3...g5 followed by 4...Bg7, rounding up the pawn on e5, which leads to just a modest advantage for White.
Games and analysis
The coverage is divided as follows:
1. 2...d6 3.exd6 Bxd6 (I also examine White's alternatives to 2.dxe5 here)
2. 2...d6 3.Nf3 Bg4 4 Bg5
3. 2...d6 3.Nf3 Bg4 4.e4
4. 2...Nc6 3.Nf3 (with an examination of alternatives to 3.Nf3) 3...f6 4.exf6 sidelines
5. 2...Nc6 3.Nf3 f6 4.exf6 Nxf6 5.Bg5
6. 2...Nc6 3.Nf3 f6 4.e4
7. 2...Nc6 3.Nf3 Bc5
1. 2...d6 3.exd6 Bxd6 (I also examine White's alternatives to 2.dxe5 here)
2. 2...d6 3.Nf3 Bg4 4 Bg5
3. 2...d6 3.Nf3 Bg4 4.e4
4. 2...Nc6 3.Nf3 (with an examination of alternatives to 3.Nf3) 3...f6 4.exf6 sidelines
5. 2...Nc6 3.Nf3 f6 4.exf6 Nxf6 5.Bg5
6. 2...Nc6 3.Nf3 f6 4.e4
7. 2...Nc6 3.Nf3 Bc5
[Event "Internet Section 06A g/8'+2"]
[Site "Dos Hermanas"]
[Date "2004.03.06"]
[Round "5"]
[White "Naranjo Espinosa, Sebastian"]
[Black "Rodrigues, Adriano Pfuhl"]
[Result "0-1"]
[ECO "A40"]
[WhiteElo "2047"]
[BlackElo "2305"]
[PlyCount "40"]
[EventDate "2004.03.06"]
[EventType "blitz"]
[EventRounds "9"]
[EventCountry "ESP"]
[Source "ChessBase"]
[SourceDate "2004.05.04"]
{I cover the Blackburne-Hartlaub Gambit in three parts: Part 1, 3.exd6 and
2nd-move alternatives, Game 2, 3.Nf3 Bg4 4.Bg5, and Game 3 covers 3.Nf3 Bg4 4.
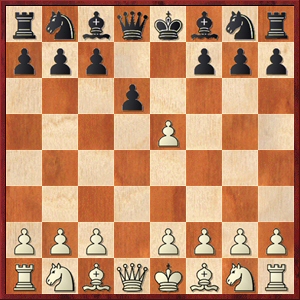
e4, which transposes to a dubious line of the Philidor Defence.} 1. d4 e5 {
Black insists on avoiding a typical queen's pawn type of game, aiming to
sacrifice a pawn in order to get active piece play and practical chances.} 2.
dxe5 {White should take the pawn, but occasionally prefers to try something
else.} (2. c3 {has been suggested by Eric Schiller, transposing to a line of
the Saragossa Opening. White intends to meet ...e5xd4 with c3xd4, giving White
the positional advantage of two centre pawns vs. Black's one. For this reason,
I recommend that Black avoids the obvious capture on d4.} Nc6 {is probably the
surest "equaliser", transposing to a position also reached via 1. d4 Nc6!? (an
unusual, but playable, line against 1.d4) 2.c3?! e5. Black simply defends the
e5-pawn.} (2... e4 {is also worth considering. The e4-pawn cramps White's game,
but can potentially become a weakness later in the game if Black isn't careful.
Note that White can transpose to the variation 1.e4 d5 2.e5 c5, with colours
reversed, with} 3. c4 $5) 3. dxe5 (3. d5 Nce7 {isn't a significant problem for
Black.}) 3... Nxe5 4. Nf3 Nxf3+ 5. exf3 Bc5 6. Bd3 Qe7+ {#[Position after 6...
Qe7+]} 7. Be2 ({Probably best is the dull response} 7. Qe2 {:} Qxe2+ 8. Kxe2
Nf6 $11) 7... Nf6 {and Black has a slight advantage because Black has more
pieces out and White's kingside pawn structure is compromised. One game
continued forward from here:} 8. O-O O-O 9. Bd3 d5 10. a4 Be6 11. Nd2 Bd6 12.
Re1 c5 13. Nf1 Qc7 14. Bg5 Nd7 15. Bc2 Rfe8 16. Qd2 Nf8 17. Re2 f6 18. Bh4 Bf7
19. Rae1 Rxe2 20. Rxe2 Rd8 21. Bg3 d4 22. cxd4 cxd4 23. Be4 Ng6 24. Re1 Bf4 $2
(24... Nf4 $15) 25. Rc1 $4 (25. Bxg6) 25... Qxc1 {0-1 (25) Cvorovic,D (2441)
-Mestrovic,Z (2376) Rabac 2004}) (2. Nf3 {is neutralised by the continuation}
e4 3. Ne5 d6 4. Nc4 d5 {- Stefan Bücker in his 1988 book on the Englund Gambit
}) (2. d5 $6 {is a surprisingly common reaction in blitz games on the Internet.
It concedes a lot of control over the dark squares to Black, and in this line
it is generally White who is struggling to equalise. Black should follow up
with ...Bc5 and .. .Nf6, with the idea of putting pressure on f2 if White
tries to reinforce the d5-pawn with e2-e4.} Bc5 {Black immediately takes
command of some of some important dark squares that White has weakened by
playing d4-d5.} 3. e4 {This move leaves the f2-pawn rather weak, which means
that White has to be careful not to play Ng1-f3 too early because of ...Nf6
and ...Ng4. However, if White plays in a more restrained manner instead, with
e2-e3, then this can leave the d5-pawn without much support.} (3. Nc3 d6 4. Nf3
{is probably good enough for equality.}) 3... Nf6 4. Bd3 c6 5. c4 Qb6 {Black
is already starting to develop some play against f2.} 6. Qe2 d6 7. h3 {[%eval
-32767,0] [Position after 7.h3]} Na6 {The old saying goes, "Knights on the rim
are dim", but this knight threatens to move to b4, and if White prevents this,
then it can go to c7, adding to the attack against White's d5-pawn.} 8. Nf3 (8.
a3 {is sensible, preventing ...Nb4.}) 8... Nb4 9. O-O Nh5 10. Rd1 Ng3 11. Qe1
f5 12. Nc3 Nxd3 13. Rxd3 O-O 14. Rd2 $6 (14. Ng5) 14... Nxe4 15. Nxe4 fxe4 16.
Qxe4 Bf5 17. Qh4 e4 18. Ng5 e3 {0-1 (18) Ceterski,T (2200)-Lykke,H (2200) ICCF
email 1997}) (2. e4 {is an interesting move psychologically, trying to revert
to the role of gambiteer. Black's best is then to take on d4, when White has
quite a few gambit options.}) (2. e3 {gives Black a choice between 2...exd4
(which will usually lead to a French Defence, Exchange Variation), 2...Nc6,
and 2...e4!?, trying to get a sort of reversed French Defence Advance
Variation.}) 2... d6 {This is known as the Blackburne-Hartlaub Gambit. Black
aims to generate active piece play and use the slight development advantage to
launch an attack against the white king.} 3. exd6 {White takes the pawn
immediately. This is the most obvious move, but is probably not as good as 3.
Nf3, because Black is able to develop freely after this.} Bxd6 {This leaves
Black with at least half a pawn's worth of compensation, which can prove
tricky to defend against in rapid games.'} 4. Nf3 Nc6 {Both sides compete for
some important central squares and get pieces out.} 5. e4 {White prepares to
develop the f1-bishop and get castled to comparative safety, for in this kind
of "development gambit" with open lines, it is dangerous to leave the king in
the centre for too long.} Bg4 {Black takes the opportunity to pin the knight
on f3 to the queen, and prepares ...Qd7 (or ...Qe7) and ... 0-0-0,
anticipating that White is most likely to castle short, and so castling on the
opposite side of the board makes sense, to make it easier to throw pawns
forward at the white king without leaving the black king fatally exposed.} 6.
Be2 {White breaks the pin.} (6. Bb5 {is more active, but Black can still
continue with the queenside castling plan, e.g.} Nge7 7. O-O O-O (7... Qd7 {
makes sense, persisting with the idea of castling queenside, although this
puts the c6-knight in a potentially awkward pin.} 8. Be3 O-O-O $14 {is quite a
typical continuation, where Black will try to generate hacking chances on the
kingside.}) 8. Bg5 Ne5 9. Be2 $14 {Diagram [#] and White went on to win in Van
Lishout,F (2044)-Doetjes,R (1508) Eupen 2006}) 6... Qe7 7. Nc3 O-O-O {Diagram
[#] Black has the desired setup, and White is only slightly better in this
position. Black's aim is to launch a kingside attack.} 8. Nd2 $6 (8. Bg5 $14 {
puts more pressure on the black position.}) (8. Nd4 {is another good idea,
encouraging piece exchanges.}) 8... Bxe2 9. Qxe2 Nd4 10. Qc4 $2 (10. Qd3 {is
the best way to cover c2, although Black has enough compensation for the pawn
after} Bc5 $44) 10... Nxc2+ 11. Kd1 Nxa1 12. Nd5 Qe6 13. Qa4 Kb8 14. b3 c6 15.
Ne3 Nf6 16. Bb2 Be5 17. Kc1 Bxb2+ 18. Kxb2 Rxd2+ 19. Kxa1 Qe5+ 20. Kb1 Qb2# 0-1
[Event "HUN-chT 0304"]
[Site "Hungary"]
[Date "2003.10.05"]
[Round "2"]
[White "Restas, Peter"]
[Black "Dombai, Istvan"]
[Result "1-0"]
[ECO "A40"]
[WhiteElo "2237"]
[BlackElo "2226"]
[PlyCount "89"]
[EventDate "2003.09.28"]
[EventRounds "11"]
[EventCountry "HUN"]
[Source "ChessBase"]
[SourceDate "2004.05.04"]
{Although White should be better after 3.exd6 Bxd6, the previous game
illustrated that Black does get a certain amount of compensation for the pawn,
and a couple of slips by White in that line can lead to disaster. Hence, White
should prefer 3.Nf3, and one idea is then to follow up with 4.Bg5, causing
some disruption to Black's development plan.} 1. d4 e5 2. dxe5 d6 3. Nf3 {This
is probably White's best response, defending the e5-pawn and waiting for a
better moment to take on d6.} Bg4 {Black develops the queen's bishop actively,
with the idea that if White moves the e-pawn, then White's f3-knight is left
in an awkward pin.} (3... dxe5 {is no good because White trades queens and
ends up a pawn up in a simplified position:} 4. Qxd8+ Kxd8 5. Nxe5 $16) (3...
Nc6 {is best met by} 4. Bg5 Qd7 {Unlike in the 3...Bg4 4.Bg5 Qd7 line used in
the game, this move blocks in Black's bishop on c8 and so leaves White clearly
better, as it is hard for Black to maintain a significant development
advantage.} (4... Be7 5. Bxe7 Ngxe7 6. exd6 {forces Black to take back with
the pawn, and Black should not allow queens to come off.} cxd6 {and I don't
think Black has much for the pawn after} 7. Qd2) 5. exd6 Bxd6 6. Nc3 {This
move threatens Nc3-e4, causing more disruption to Black's ideas of queenside
castling and kingside play.} h6 7. Bh4 {with quite a large advantage for White.
}) 4. Bg5 {This move disrupts Black's development plans. Black must either
play ...Qd7, after which Black cannot easily castle queenside because of the
g5-bishop pointing at d8, or ...Be7, which means that the bishop no longer
covers the d6-square.} (4. Bf4 {is playable, but not as challenging. A typical
line runs:} Nc6 5. exd6 Qf6 {This is an important zwischenzug, attacking b2
and encouraging White to react with a passive queen move.} 6. Qc1 Bxd6 7. Bxd6
Qxd6 {Here Black doesn't quite have full compensation for the pawn, but this
position offers reasonable practical chances.} 8. Qd2 Qe7 9. Nc3 $14 {Diagram
[#] Black doesn't have full compensation for the pawn but went on to win a
nice attacking game in Onikienko,V (2265) -Podolchenko,E (2458) Odessa 2007})
4... Qd7 {This is the lesser evil. Black still keeps the f8-bishop pointing at
d6, rather than allowing it to be traded off.} (4... Be7 5. Bxe7 Nxe7 6. exd6
Qxd6 $6 (6... cxd6 {keeps queens on the board, though White is still better, e.
g.} 7. Qd3 O-O 8. Nc3 $16) 7. Qxd6 cxd6 8. Nc3 {Diagram [#] Black has nothing
for a pawn and resigned just six moves later in Oppermann,P (2259)-Nicholls,M
(2202) ICCF email 2011}) 5. Nbd2 {Reinforcing the knight on f3.} (5. exd6 Bxd6
6. Nc3 {, threatening Nc3-e4, is the most convincing way to get the advantage,
in my opinion, but I cannot find any practical examples.}) 5... h6 6. Bf4 (6.
Bh4 {is more challenging, refusing to give up the attack on the d8-square.})
6... Nc6 {Attacking e5 and therefore encouraging White to take on d6.} 7. exd6
Bxd6 8. Bxd6 Qxd6 $14 {Diagram [#] In this position Black has a fair amount of
compensation for the pawn due to the superior piece activity.} 9. e3 {
Restrained, but if White advances to e4 instead, the e4-pawn could become a
target for attack.} O-O-O {A standard idea in this variation for Black. If
White castles kingside then Black can consider trying to storm the white king
by advancing the kingside pawns.} 10. Be2 Nf6 11. O-O $6 ({White should
probably try to castle queenside to reduce Black's scope to unbalance the
position, e.g.} 11. c3 Rhe8 12. Qa4 Kb8 13. O-O-O $14) 11... Qb4 {This wins
the pawn on b2 thanks to the attack on the knight on d2 and the pin against
the queen on d1. It is often risky going after the b-pawn like this, but here
Black seems able to get away with it.} ({Black could have considered starting
a kingside attack with} 11... h5 {but then} 12. h3 {is slightly better for
White, as long as White takes care not to grab the bishop on g4 at the wrong
time.}) 12. c3 (12. a3 Qxb2 13. Bd3 $11 {is probably the best way to give up
the pawn.}) 12... Qxb2 13. Nd4 {This leads to a flurry of exchanges that lead
to a better position for Black, although there doesn't appear to be anything
better for White here.} Bxe2 14. Qxe2 Qxc3 15. Nxc6 (15. N2b3 {leads to the
loss of a pawn for minimal compensation:} Nxd4 16. Nxd4 Rhe8) 15... Rxd2 16.
Nxa7+ Kb8 17. Nb5 Qb4 (17... Rxe2 18. Nxc3 Rd2 {is better for Black because it
is hard for White to get rid of Black's powerful rook on the seventh rank.})
18. Qe1 Rb2 19. Qxb4 Rxb4 20. Nd4 {In this position Black has less of a strong
advantage due to the lack of a powerful rook on the seventh.} g6 (20... Rb2 21.
Rfb1) 21. Rab1 Rxb1 22. Rxb1 Kc8 23. f3 Nd5 24. e4 {Now White has probably
equalised.} Nb6 (24... Nc3 25. Rb3 Rd8 26. Rxc3 Rxd4 {is the computer's
suggestion but such an ending would be very hard for Black to win.}) 25. Kf2 (
25. Nb5 {seeking counterplay was White's best way to hold the balance here.
Now Black starts to outplay White and gets the advantage again.}) 25... Rd8 26.
Ke3 Nc4+ 27. Kd3 Ne5+ 28. Kc3 c5 29. Nb3 b6 30. a4 Rd3+ 31. Kc2 Re3 32. Nc1 Nc4
{White has rather "lost the thread" and is stuck in a passive position.} 33.
Rb3 {This should lose a pawn.} Rxb3 34. Nxb3 Kc7 $2 (34... Ne3+ 35. Kd3 Nxg2 {
and I don't think White has much to show for the pawn.}) 35. g4 Kc6 36. h4 Ne5
37. Nd2 b5 38. axb5+ Kxb5 39. g5 hxg5 40. hxg5 Kb4 41. f4 Nc4 42. e5 {This
move is not best- but it works well in the game!} (42. Nf3) 42... Nxd2 $4 {
Leading to a lost king and pawn endgame.} (42... Ne3+ 43. Kd3 (43. Kb2 Nd5)
43... Nf5 {should give Black the better chances, although a draw is the most
likely result.}) 43. Kxd2 Kc4 44. f5 Kd5 45. e6 1-0
[Event "RUS-Cup04"]
[Site "Samara"]
[Date "2002.07.29"]
[Round "4"]
[White "Kosintseva, Tatiana"]
[Black "Yurtaev, Leonid"]
[Result "0-1"]
[ECO "C41"]
[WhiteElo "2441"]
[BlackElo "2552"]
[PlyCount "112"]
[EventDate "2002.07.26"]
[EventRounds "9"]
[EventCountry "RUS"]
[Source "ChessBase"]
[SourceDate "2004.05.04"]
{Instead of the logical 4.Bg5, White can also consider 4.e4, which
concentrates on development, and may well be best of all, as I don't think
much of Black's compensation for the pawn in this line if Black persists in
playing a gambit, while White is clearly better if Black regains the pawn on
e5.} 1. e4 e5 2. Nf3 d6 3. d4 Bg4 $6 4. dxe5 {This position also arises after
1.d4 e5 2.dxe5 d6 3.Nf3 Bg4 4.e4.} Nd7 {Black's best practical chance is to
persist in sacrificing a pawn, but Black will probably not get much
compensation for the pawn if White plays accurately.} (4... Nc6 $6 5. Bb5 {is
an inferior version for Black.}) (4... Bxf3 $6 5. Qxf3 dxe5 6. Bc4 {was played
in the famous game between Paul Morphy and the Duke of Brunswick, and White
already has a large advantage in this position.} Nf6 7. Qb3 Qe7 8. Nc3 c6 9.
Bg5 {Diagram [#]} b5 $6 (9... Na6 10. Bxa6 bxa6 11. O-O $16) 10. Nxb5 cxb5 $6 (
10... Qb4+) 11. Bxb5+ Nbd7 12. O-O-O Rd8 13. Rxd7 $1 Rxd7 14. Rd1 Qe6 15. Bxd7+
Nxd7 16. Qb8+ $1 Nxb8 17. Rd8# {1-0 Morphy,P-Isouard,C Paris 1858}) 5. exd6 {
White should now take the pawn under improved circumstances, since e2-e4 is a
more useful move than ...Nb8-d7.} Bxd6 6. Be2 {White breaks the pin on the
f3-knight.} Ngf6 7. Nc3 Qe7 {Black develops, putting pressure on the e4-pawn,
and retains the option of castling to either side of the board.} 8. Nd4 {This
move forces exchanges of pieces, which is favourable to White, being a pawn
ahead.} Bxe2 9. Qxe2 {Diagram [#] I don't think Black has much to show for the
pawn here.} Bb4 (9... O-O-O {is tempting, with the idea of rolling the
kingside pawns forward if White castles kingside. However,} 10. Nf5 Qf8 11. O-O
{is good for White, as it will take a while before Black can generate much of
a kingside attack, while White has attacking ideas on the queenside with Nd4
and Nb5.}) 10. O-O O-O 11. Nf5 Qe6 12. f3 {White has a substantial advantage
here due to the extra pawn.} Rfe8 13. Qf2 Bc5 14. Ne3 {This is relatively
passive and the pin on the e3-knight costs White a bit of time.} (14. Nd4 {
would have been stronger, promising quite a large advantage for White. White
can break the pin against the queen by playing Be3 on the next move.}) 14...
Nb6 15. Kh1 Rad8 16. Qe2 g6 17. Ned1 Nh5 {After this move, Black is forced to
back-pedal, and White is able to kill off Black's compensation for the pawn.} (
17... Nc4 {is a good active move, which leaves Black with a fair amount of
compensation for the pawn due to the better piece activity.}) 18. Nf2 c6 19.
Nd3 Bd4 20. Be3 Bg7 21. Nc5 Qe7 22. Rad1 Rxd1 23. Rxd1 f5 24. Kg1 Be5 25. g3 $6
{Creating a weakness on the kingside, which provides Black with chances.} (25.
Qf2 $16 {maintains a significant advantage for White thanks to the extra pawn.}
) 25... f4 26. gxf4 Nxf4 27. Bxf4 Bxf4 28. Nd3 Rf8 29. Nxf4 Rxf4 30. Qd3 Rf8
31. Ne2 Qf7 32. Kg2 Nc4 33. Qb3 b5 34. Rd3 (34. Nd4) 34... Qf6 35. Qc3 Ne5 36.
Re3 Qg5+ 37. Kh1 Rd8 38. Ng1 b4 39. Qe1 c5 40. Re2 Qf6 41. Qf2 Rd1 42. Rd2 $2 {
Allowing Black to regain the pawn and secure a large, probably winning,
advantage due to the actively-placed rook.} (42. Re1 {was probably the best
defence, which still leaves White with an extra pawn, though Black has
compensation.}) 42... Qxf3+ 43. Qg2 Qxg2+ 44. Rxg2 Kf7 45. Rf2+ Ke6 46. Kg2 Ng4
47. Re2 Rc1 48. h3 Ne5 49. b3 Ra1 50. Nf3 Rxa2 51. Nxe5 Kxe5 52. Kf3 c4 53. Rd2
Ke6 54. bxc4 b3 55. Rd3 bxc2 56. Rc3 Ra3 0-1
[Event "Dos Hermanas Internet qual-B 10th"]
[Site "ICC INT"]
[Date "2009.03.13"]
[Round "5"]
[White "Darruda, Ricardo"]
[Black "Zilbermintz, Lev"]
[Result "0-1"]
[ECO "A40"]
[BlackElo "2014"]
[PlyCount "36"]
[EventDate "2009.03.13"]
[EventType "blitz"]
[EventRounds "12"]
[EventCountry "ESP"]
[Source "ChessBase"]
[SourceDate "2004.05.04"]
{My coverage of the Soller Gambit is divided up into four parts. Game 1 covers
4.exf6 Nxf6 and White's 4th and 5th-move alternatives to 5.Bg5, Game 2 deals
with 5.Bg5, and Game 3 deals with 4.e4, with the aim of returning the pawn and
ganging up on f7 with Bc4 and Ng5, which is probably more of an issue for
Black than the lines where White takes on f6. Finally, Game 4 deals with the
Felbecker Gambit, 3...Bc5, which is a variant on the Soller Gambit approach,
where again, it seems that the approaches where White meets ...f7-f6 with
e2-e4 are the biggest problem for Black.} 1. d4 e5 2. dxe5 Nc6 {Black develops
a piece and attacks the e5-pawn.} (2... f6 {is the other route to the Soller
Gambit, which will usually transpose after} 3. e4 ({or} 3. exf6 Nxf6 4. Nf3 Nc6
) 3... Nc6 4. Nf3 (4. Bc4 {was given by Stefan Bücker in his 1988 book but
Black then has a relatively easy game after} Nxe5 {(suggested by Soller
himself).})) 3. Nf3 {This is White's most popular response to 2...Nc6 and is
almost certainly best, although there are a couple of decent alternatives.} (3.
e4 {transposes to a line of the Nimzowitsch Defence, 1.e4 Nc6 2.d4 e5 3.dxe5,
which was boften used from the black side by Tony Miles. This should be
slightly better for White, but it is certainly no refutation of the Englund
Gambit. The Nimzowitsch Defence is quite an important opening system, and is
not the subject of this article, so I'll restrict myself to a few sample lines.
} Nxe5 {Black should take the pawn here.} 4. Nf3 {This is the positional
option.} (4. f4 {is more aggressive, but less likely to give White an
advantage.} Nc6 {I prefer this to the other knight retreat, 4...Ng6, where the
knight is in danger of being hit by f4-f5.} 5. Nf3 Bc5 {Black takes advantage
of the weakening of the kingside dark squares created by 4.f4.} 6. Nc3 {#
[Position after 6.Nc3]} Nf6 {This allows e4-e5, but the pawn push isn't such a
big threat for Black in this position. Instead 6... d6 has scored very well
for White in practice.} 7. Bc4 O-O 8. e5 Re8 {offers equal chances.}) 4... Bb4+
{White's queen's knight normally belongs on c3 in this line, so Black
encourages c2-c3, taking the c3-square away from the knight.} (4... Qf6 {leads
to a slightly better position for White after} 5. Nc3 Bb4 6. Bd2 Ne7) 5. c3
Nxf3+ 6. Qxf3 Bc5 7. Bc4 {Attacking f7. #[Position after 7.Bc4]} Qf6 ({If
Black would rather not trade queens, I see nothing wrong with the apparently
untested alternative} 7... Qe7) 8. Nd2 (8. Qg3 {is also quite good.}) 8... d6
9. O-O Qxf3 10. Nxf3 Bg4 {and most games from here end in draws, though with a
slight edge for White, e.g.} 11. Nd4 Nf6 12. h3 Bd7 13. Bf4 O-O-O 14. Rfe1 Rhf8
15. e5 dxe5 16. Bxe5 Ne8 17. Nb3 Bb6 18. Rad1 Bf5 19. Rxd8+ Kxd8 20. Rd1+ Kc8
21. Nd4 Bd7 22. Kf1 a6 {'1/2-1/2 (26) Bodek,M (2316)-Gelashvili,T (2566) Las
Vegas 2012'} 23. Re1 Kd8 24. Rd1 Kc8 25. Re1 Kd8 26. Rd1 Kc8 {1/2-1/2 (26)
Bodek,M (2316)-Gelashvili,T (2566) Las Vegas 2012}) (3. f4 {holds onto the
extra pawn, but should not give White any advantage, since it is a weakening
pawn move that does not contribute to development. It should probably be met by
} d6 (3... f6 4. Nf3 $1 fxe5 5. fxe5 {is good for White, e.g.} Qe7 6. Qd5 $1 {
and Black cannot challenge the e5-pawn with ...f7-f6.}) 4. Nf3 (4. exd6 $6 Bxd6
{gives Black excellent compensation.}) 4... Bg4 5. Qd3 Qd7 $44) (3. Qd5 {
doesn't work for White after} Nge7) (3. Bf4 {is the other critical line.} g5 {
is Black's main independent possibility, suggested by James Hickey from
Australia. Black generally regains the pawn on e5 but White gets a positional
edge. This line is the main reason why 3.Nf3 is more critical than 3.Bf4.} (
3... f6 4. Nf3 {transposes to the Soller Gambit- see 4.Bf4 in the notes to
White's 4th move}) (3... Nge7 4. Nf3 {transposes to a line of the Zilbermints
Gambit, 4.Bf4}) (3... Qe7 4. Nf3 {transposes to the main line of the Englund
Gambit, 4.Bf4} (4. Nc3 Nxe5 5. Nd5 Qd6 6. Qd4 {is quite a good alternative for
White.})) 4. Bg3 (4. Bd2 $5 Bg7 5. Nc3 $14) 4... Bg7 {and White does best to
just develop and let Black regain the pawn, e.g.} 5. Nc3 Nge7 6. Qd2 Ng6 7.
O-O-O Ngxe5 8. e3 $14 {#[Position after 8.e3] with a slight advantage for
White in view of Black's weakened kingside. One game continued forward from
here:} d6 9. h4 h6 10. Nge2 Be6 11. b3 Qf6 12. Nd4 O-O-O 13. Bb5 {with just a
slight edge for White in a double-edged position, Lopez Linares,L (1892)
-Morin,L (1886) Montreal 2011}) 3... f6 {This is the Soller Gambit. It is
essentially a Blackmar-Diemer Gambit with a tempo less, and therefore, with
accurate play, Black should not get enough compensation for the pawn. However,
the BDG can still be quite dangerous even after losing a tempo, and White
still has to take some care, especially at fast time controls. Lev
Zilbermintz is more commonly associated with his pet line 3...Nge7, but quite
often ventures 3...f6 as well.} 4. exf6 {White takes the pawn. This should be
better for White with best play, but White has a couple of other good moves.
The third game features 4.e4, where White returns the pawn, but for the first
two games I focus on lines where White holds onto the pawn.} (4. Bf4 {is
analogous to the Vienna Defence to the Blackmar-Diemer Gambit (1.d4 d5 2.e4
dxe4 3.Nc3 Nf6 4.f3 Bf5) and it looks quite good.} fxe5 ({Or} 4... g5 5. Bg3 g4
6. Nd4 Nxe5 7. Nc3 {and Black has regained the pawn, but White has quite a
large advantage, as White has more pieces out and Black's kingside has many
weaknesses.}) 5. Nxe5 Qf6 6. Nd3 d6 {This is Stefan Bücker's suggestion, via
transposition from 3. Bf4 f6 4.Nf3.} 7. Nc3 Be6 {#[Position after 7...Be6]} 8.
Ne4 (8. Qd2 {is a sensible alternative}) 8... Qg6 9. Nc3 (9. Ng5 {is more of a
test, encouraging Black's e6-bishop to move again, with some advantage for
White}) 9... O-O-O {One practical example saw Black's attack succeed from here,
though Black was much the higher-rated player:} 10. g3 Nf6 11. Bg2 d5 12. Ne5
Nxe5 13. Bxe5 Bc5 14. O-O Qh5 15. Bd4 {and Black's attacking chances are not
worth a pawn, but Black went on to win, Csoma,R (1512)-Garibaldi,L (1891)
Chessfriend.com 2003}) 4... Nxf6 {As in the Blackmar-Diemer Gambit, it is
better to take with the knight than with the queen- even though, in the case
of the Soller Gambit, taking with the queen does not concede a second pawn. It
is important to develop the king's knight to its best square.} (4... Qxf6 $6 5.
Nc3 {with the idea Nc3-d5 leaves Black with nothing for a pawn.}) 5. Nc3 {A
sensible move, simply developing a piece and highlighting the issue that Black
is only one tempo ahead in development in return for the pawn. Gary Lane
instead recommends 5. Bg5, which features in the next game. White has some
reasonable alternatives.} (5. g3 Bc5 ({White can use the extra tempo to make
it difficult for Black to carry out the plan with ... Bf5, ...Qd7, ...0-0-0
and a h-pawn hack, e.g.} 5... d5 6. Bg2 Bf5 7. Nc3 Qd7 8. Nd4 Nxd4 (8... O-O-O
9. Nxf5 Qxf5 10. Qd3) 9. Qxd4) 6. Bg2 d5 7. O-O O-O 8. Bg5 {with some
advantage for White. One practical example which saw White make the extra pawn
count ran:} Be6 9. Nc3 a6 10. Ne1 Ne7 11. Nd3 Bd6 12. Bxf6 Rxf6 13. e4 $16 {
Kludacz,M (2218) -Savary,X (1902) Rennes 2008}) (5. Bf4 {is sensible but does
not promise White much advantage.} d5 6. e3 Bd6 {was recommended by Stefan
Bücker in his 1988 book on the Englund Gambit. Exchanging pieces generally
isn't ideal, but here Black is swapping off quite an important defensive piece.
} 7. Bxd6 Qxd6 8. Nc3 Be6 {Diagram [#] gives Black about half a pawn's worth
of compensation, and Blackmar-Diemer Gambit aficionado Peter Leisebein won a
nice game from this position:} 9. Qd2 O-O 10. O-O-O Rad8 11. Bb5 a6 12. Bxc6
bxc6 13. h3 Bf7 14. Qe2 (14. Qd4 $14) 14... Rb8 15. Qxa6 {This capture is
probably too greedy.} Ra8 16. Qd3 Rfb8 17. a4 (17. Qd4 {is met by the powerful
rook sacrifice} Rxb2 $3 18. Kxb2 Qa3+ 19. Ka1 c5) 17... Qb4 18. Ne5 Ne4 19.
Nxe4 Qxb2+ 20. Kd2 Qxe5 {and Black has the upper hand in spite of the pawn
minus, Probstfeld, B-Leisebein,P DESC email 2005}) 5... d5 {Black takes some
control of the centre, though the downside of this move is that the d5-pawn
can potentially become a target.} (5... Bc5 {is well met by} 6. Bg5 {followed
by e2-e3, blunting the scope of the c5-bishop.}) 6. e3 {This is quite a
passive, but solid, follow-up, analogous to the Euwe Defence to the
Blackmar-Diemer (1.d4 d5 2.e4 dxe4 3.Nc3 Nf6 4.f3 exf3 5.Nxf3 e6).} Bg4 7. Be2
Bd6 {The bishop belongs here rather than on c5, since White has protected f2
against potential attacks by playing e2-e3.} 8. Nd4 {A sensible response,
encouraging a trade of pieces.} Bxe2 9. Ncxe2 (9. Qxe2 {may be a slightly
better recapture.}) 9... Qd7 10. Nxc6 bxc6 11. O-O O-O $14 {Diagram [#] Black
has some compensation for the pawn here, but not enough. However, the further
course of this game shows how dangerous these kind of positions can be for
White in rapid games.} 12. b3 Qf5 13. Bb2 $2 {Falling for a "Greek gift" type
of sacrifice on h2.} (13. Nd4 $14 {prevents Black from making significant
progress with the kingside attack.}) 13... Bxh2+ $1 14. Kxh2 Ng4+ (14... Qh5+ {
is arguably more precise as it forces White to move the king to g1, since Kg3
is met by ...Ne4 with checkmate.}) 15. Kg3 (15. Kg1 Qh5 {forces White to
sacrifice a piece to avoid checkmate with} 16. Be5 {whereupon Black should
play for more, e.g. with} Rae8 {threatening to take on e5 with a rook.}) 15...
Qg6 $2 {Threatening a nasty discovered check, but White has a way out.} (15...
Nxf2 {is better for Black, for example,} 16. Rxf2 Qxf2+ 17. Kh2 Rae8) 16. Nf4
$2 {But this isn't it, because Black simply chops this knight off.} (16. Qd3 {
leaves Black without a good follow-up.}) 16... Rxf4 $1 17. exf4 Ne3+ 18. Kh2 {
White could have lasted a bit longer by moving the king to h4, but it's a
forced mate regardless of what White does.} Qxg2# 0-1
[Event "EU-ch MN019 email"]
[Site "ICCF email"]
[Date "2000.??.??"]
[Round "?"]
[White "Koch, Michael B"]
[Black "Mary, Patrick"]
[Result "1-0"]
[ECO "A40"]
[WhiteElo "2360"]
[BlackElo "2350"]
[PlyCount "41"]
[EventDate "1999.??.??"]
[EventType "corr"]
[EventRounds "10"]
[Source "ChessBase"]
[SourceDate "2004.05.04"]
{Instead of White's other fifth-move alternatives, it's worth having a close
look at Gary Lane's recommendation, 5.Bg5, which is quite good for White, but
Black still gets some practical chances.} 1. d4 e5 2. dxe5 Nc6 3. Nf3 f6 4.
exf6 Nxf6 5. Bg5 {Diagram [#] With 5.Bg5, White pins the f6-knight and has
ideas of Nc3 and Nd5, adding to the pressure on the knight. Therefore, Black
should react quickly by kicking the bishop.} h6 $1 {As in the analogous line
of the Blackmar-Diemer Gambit (1. d4 d5 2.e4 dxe4 3.Nc3 Nf6 4.f3 exf3 5.Nxf3
Bg4), this is most likely Black's best response, also recommended by Stefan
Bücker in his 1988 book, which immediately forces White's bishop to either
exchange off, or move to a less ideal square.} (5... d5 6. e3 {scores heavily
for White, e.g.} Bc5 (6... h6 {transposes into the note to Black's sixth move
in the game, but it is not convincing either.}) 7. Nc3 Be6 8. Bb5 $16) 6. Bh4 (
6. Bxf6 Qxf6 7. c3 {is unconvincing and allows Black to offer an interesting
pawn sacrifice:} d5 $5 (7... b6 {is a good alternative, e.g.} 8. e3 Bb7 9. Nbd2
O-O-O $14) 8. Qxd5 (8. e3 Be6 9. Bb5 Bd6 10. Nbd2 O-O {gives Black reasonable
compensation for the pawn, and Black's attack went on to succeed in the
following game:} 11. Bxc6 bxc6 12. Qa4 Rab8 13. Nb3 $2 (13. O-O-O c5 $44) 13...
c5 14. O-O Qg6 15. Nbd2 Rxb2 16. Rab1 $2 Rxb1 17. Nxb1 Rxf3 18. g3 Bh3 19. Qh4
Bxf1 20. Kxf1 Qxb1+ 21. Kg2 Rf8 {0-1 (21) Reede,A-Reilly,I LSS email 2008})
8... Be6 9. Qd3 Bd6 10. Nbd2 O-O-O {and Black has a lot of piece play in
return for the two sacrificed pawns, although with best play White should
still be better.}) 6... g5 {Gaining space on the kingside.} (6... d5 7. Nc3 Be6
{is the main alternative, though I don't think Black has much for the pawn
after} 8. Nd4 Nxd4 9. Qxd4 Be7 10. O-O-O) 7. Bg3 Bc5 {Black develops a piece
but this is probably not the best way to put White under pressure.} (7... Ne4 {
makes the most sense to me, as it is consistent with what White normally plays
in this situation in the Blackmar-Diemer Gambit.} 8. Qd3 (8. e3 Bg7 9. c3 d5
$14) 8... d5 9. Nbd2 Bf5 (9... Nxg3 {is met by the important "zwischenzug"} 10.
Qg6+ $1 Ke7 11. hxg3 $16) 10. Nxe4 Bxe4 11. Qb3 Bg7 $14 {Diagram [#] gives
Black about half a pawn's worth of compensation. White should not be tempted
to take on b7:} 12. Qxb7 $6 Kd7 $1 13. c4 Rb8 14. Qa6 Nb4 $15) 8. e3 {A
sensible reaction, cutting off the c5-bishop's line to f2.} d6 {Similarly,
Black blunts the scope of the g3-bishop, which was pointing at c7.} (8... d5 9.
Nc3 {leaves Black's d5-pawn quite vulnerable.}) 9. Nc3 Bf5 {Developing to an
active square, but this bishop is soon exchanged off.} (9... Be6 {is worth
considering, which makes it harder for White to exchange off the light-squared
bishops.}) 10. Bd3 {Encouraging a trade of pieces, which is to White's
advantage, being a pawn ahead.} Qd7 11. Bxf5 Qxf5 12. Qd3 Qxd3 {I am tempted
to give this move the "?!" mark, even though it is probably objectively best,
for when a pawn down for insufficient compensation, sometimes the best move is
not the best practical decision. Computers recommend this move, but with
queens off the board, Black's attacking chances are considerably reduced.} (
12... Qd7 13. a3 {is a good plan for White, preparing a queenside attack for
in case Black decides to castle long, but Black will always have some hacking
chances in this type of position.} O-O-O 14. b4 Bb6 15. b5 Ne7 16. O-O $16) 13.
cxd3 O-O-O {From here, White consolidates, and emerges a pawn ahead for
nothing.} 14. h3 Nh5 15. Bh2 Rhe8 16. O-O a6 17. d4 Ba7 18. Rfc1 Nf6 19. b3 Rf8
20. a3 Rde8 21. b4 {Black's resignation strikes me as premature, but Black is
a pawn down for no compensation, and probably didn't fancy defending a grim
position with no winning chances for fifty-odd moves.} 1-0
[Event "Heves Fregatt op 2nd"]
[Site "Heves"]
[Date "2001.05.13"]
[Round "7"]
[White "Szekeres, Robert"]
[Black "Eberth, Zoltan"]
[Result "0-1"]
[ECO "C44"]
[WhiteElo "2259"]
[BlackElo "2170"]
[PlyCount "76"]
[EventDate "2001.05.11"]
[EventRounds "9"]
[EventCountry "HUN"]
[Source "ChessBase"]
[SourceDate "2004.05.04"]
{Perhaps the biggest practical problem with the Soller Gambit is 4.e4, where
White returns the pawn and plays against Black's weak point on f7.} 1. d4 e5 2.
dxe5 Nc6 3. Nf3 f6 4. e4 {Instead of trying to hold onto the pawn, White
returns the pawn, and concentrates on developing the pieces and taking
advantage of the issue that moving the f-pawn has weakened the black kingside.}
fxe5 {There is nothing better.} (4... Bc5 5. Bc4 {is very good for White, with
all sorts of threats against Black's kingside- Bxg8, Qd5 and Ng5 are all
strong possibilities.}) (4... Nxe5 $2 5. Nxe5 {wins a piece since} fxe5 6. Qh5+
{is a disaster for Black.}) 5. Bc4 {Diagram [#] This transposes to a line of
the Rousseau Gambit: 1.e4 e5 2.Nf3 Nc6 3.Bc4 f5 4.d3 fxe4 5.dxe4, in which
Black's 3rd and 4th moves are both dubious. It can also be seen as a good line
of the King's Gambit Declined (1.e4 e5 2.f4 Bc5) with an extra tempo.} Nf6 (
5... d6 {is probably the most reliable counter, intending} 6. Ng5 Nh6 7. Nc3 (
7. O-O {is a good alternative.}) 7... Nd4 {This is Stefan Bücker's suggestion,
which is probably Black's best way of generating counterplay, intending ...c6
and ...d5. However, White has quite a few ways to keep a substantial advantage,
of which the most secure may be} 8. O-O c6 9. Ne2 {Diagram [#] challenging the
knight on d4, e.g.} d5 10. exd5 cxd5 11. Nxd4 dxc4 12. Re1) 6. Ng5 {This is
reminiscent of the Two Knights Defence, but the removal of Black's f-pawn and
White's d-pawn significantly tips the evaluation in favour of White. White has
a few decent alternatives too, but I think this double attack on f7 leads to a
significant advantage for White.} d5 {This is probably objectively best.} (6...
Bc5 $5 {is in the style of the Traxler Counterattack, allowing White to bring
the knight into f7 in return for counterplay against f2, and scores well for
Black in the database, but objectively it doesn't appear to work.} 7. Nf7 Bxf2+
{The idea is to generate counterplay against White's king.} 8. Kxf2 Nxe4+ 9.
Kg1 Qh4 10. g3 {Diagram [#]} Nxg3 (10... Qf6 {is probably best, though White
is on top after} 11. Qe2) 11. Nxh8 Nxh1 12. Qd5 {1-0 (12) Di Marino,M (1882)
-Garibaldi,L (1891) Chessfriend.com 2003}) 7. exd5 Na5 8. Bb5+ c6 (8... Bd7 {
is refuted by} 9. Ne6 {which leaves White with an extra pawn and the better
position.}) 9. dxc6 Qxd1+ 10. Kxd1 Nxc6 {Diagram [#] In this simplified
position, Black doesn't have much to show for the pawn, but the course of the
game shows that White still can't afford to be complacent.} 11. Bxc6+ {I don't
really like this move as the damage to Black's pawn structure is more than
offset by Black's bishop-pair and the half-open b-file. White should have
continued developing, say, with Re1 or Nd2.} bxc6 12. Re1 Bd6 13. Ne4 (13. Bf4
{attacking e5 would probably have given White a larger advantage.}) 13... Nxe4
14. Rxe4 O-O {In this position Black now has about half a pawn's worth of
compensation, as White is behind in development.} 15. Ke1 (15. Be3 {makes more
sense, getting another piece out.}) 15... c5 {This aims to generate
counterplay by freeing up the a8-h1 diagonal for the c8-bishop, but leaves a
hole on d5.} 16. f3 $6 (16. Nc3 {with the idea of hopping into d5 looks good.}
Bb7 17. Rg4 {is not a problem for White.}) 16... Bb7 17. Re2 e4 {Now Black has
dangerous counterplay, and White is in trouble.} 18. fxe4 Bxh2 19. c4 Rad8 20.
Bd2 $2 (20. Nd2 {with the idea of Nf3 would have enabled White to avoid major
concessions, although Black has more than enough for a pawn.}) 20... Bc8 21.
Be3 Bg4 22. Bf2 Bxe2 (22... Rd1+ $1 23. Kxd1 Rxf2 {is even stronger.}) 23. Kxe2
Rb8 24. Bxc5 Rxb2+ 25. Nd2 Rd8 26. Be3 Be5 27. Rc1 Rxa2 28. c5 Bd4 29. Bg5 Rc8
30. Be7 Be5 31. Bd6 Bf6 32. Bf4 Be7 33. Be3 Kf7 34. Kf3 Ke6 35. Nb3 Bf6 36. Rd1
Be5 37. Bd4 Ra3 38. Rd3 Rxb3 0-1
[Event "FRG-ch12 sf corr"]
[Site "Germany"]
[Date "1970.??.??"]
[Round "?"]
[White "Fleischer"]
[Black "Felbecker, Hans"]
[Result "0-1"]
[ECO "A40"]
[PlyCount "42"]
[EventDate "1970.??.??"]
[EventType "corr"]
[EventRounds "9"]
[EventCountry "GER"]
[Source "ChessBase"]
[SourceDate "2004.05.04"]
{Finally, we come to the Felbecker Gambit, 3...Bc5, which is a variation on
the Soller Gambit approach, generally intending to follow up with ...f7-f6.} 1.
d4 e5 2. dxe5 Nc6 3. Nf3 Bc5 {This is generally known as the Felbecker Gambit.
Black generally intends to follow up with ...f7-f6, in the style of the Soller
Gambit, although I think objectively, it is probably better to follow up with .
..Ng8-e7 with a sort of deferred Zlibermints Gambit.} 4. Nc3 {I used to regard
4.e4 as stronger, but upon a closer look, this response is probably White's
best, intending Nc3-e4.} (4. e4 {aims to discourage ...f7-f6 by playing Bf1-c4.
Black should probably respond with} Nge7 {with a deferred Zilbermints Gambit.
Black simply intends ...Ng6 and ...Nxe5, and probably ends up with just a
modest disadvantage.} (4... Qe7 {This puts more pressure on e5 and aids
development, but the queen is exposed to being hit by Nc3-d5 here, so I can't
recommend the move.} 5. Nc3 {Threatening 6.Nd5.} Bb4 {Black pins the c3-knight
and thus prevents Nd5.} (5... Nxe5 6. Nd5) 6. Bd2 {Breaking the pin and
renewing the Nc3-d5 threat. Black must give up the bishop-pair to prevent the
knight from hopping into d5.} Bxc3 (6... Nxe5 7. a3) 7. Bxc3 {gives White a
large advantage.}) (4... f6 $6 {is well met by} 5. Bc4) 5. Bc4 O-O {Diagram [#]
} 6. Bg5 (6. O-O {is a sensible alternative, which should be better for White.}
) 6... h6 7. Bh4 Qe8 8. Bg3 Ng6 {is not too bad for Black, Chevallier,D (2300)
-Ribreau,H (2180) France 1996}) 4... f6 {In this line with 4.Nc3, 4...f6, as
favoured by Felbecker himself, is probably Black's best bet.} (4... Nge7 5. Ne4
Bb6 6. Bf4 {is better for White than the lines that I examined after 4.e4 Nge7.
Black will not find it easy to deal with White's strong-point on e5. One
sample line runs} O-O 7. h4 {(discouraging ...Ng6 and preparing a kingside
offensive)} Re8 8. Qd3 Ng6 9. Bg5 Ncxe5 10. Nxe5 Nxe5 11. Qg3 $16) 5. Ne4 {
White tries to exchange off Black's bishop for the e4-knight, a trade which
would be in Black's favour.} (5. e4 {is stronger here than it is at move 4,
because Black has weakened the kingside light squares with 4...f6. One
plausible continuation is} fxe5 6. Bc4 Nf6 7. O-O {with quite a large
advantage for White, with the idea of} d6 8. Ng5 {with advantage for White,
although Black has scored surprisingly well in low-level games from this
position.}) (5. exf6 Nxf6 6. Bg5 {is the other major option for White, after
which Black has about half a pawn's worth of compensation.} d6 7. e3 h6 {Black
should kick the g5-bishop before White gets the chance to consolidate and
start putting pressure on the knight on f6.} 8. Bh4 (8. Bxf6 Qxf6 9. Nd5 Qf7)
8... g5 9. Bg3 Be6 10. Bb5 $14 {leaves Black with some open lines for the pawn,
but not a lot. Beneteau,H (2107) -Andrieu,P (1992) Chateauroux 2005}) 5... Bb6
{Black would rather not allow the bishop to be exchanged off.} 6. exf6 Nxf6 {
#[Position after 6...Nxf6]} 7. Ng3 $6 {This is a bit passive.} (7. Qd3 {can be
met by a strong second pawn sacrifice:} d5 8. Nxf6+ Qxf6 9. Qxd5 Be6) (7. Nxf6+
Qxf6 8. c3 $14 {is the most secure continuation for White.}) 7... d5 {Gaining
some central control.} 8. e3 {White should play this at some stage to blunt
the b6-bishop's pressure against f2.} Qe7 9. Be2 {A restrained development for
the bishop, but quite solid.} h5 {With the idea of . ..h5-h4, hitting the
knight on g3 and causing White some inconvenience.} 10. Bd3 Ne4 11. c3 h4 12.
Ne2 Bg4 {Here Black has full compensation for the pawn. Although White has
developed and avoided conceding any weaknesses, White's forces are too passive.
} 13. Nfd4 $6 {This lets Black get in ...h4-h3.} ({Better would have been} 13.
h3 Bh5 14. Nfd4 $11) 13... Nxf2 {A sharp and unclear piece sacrifice which
works well in the game, but objectively Black had better.} (13... Nxd4 14. exd4
h3 {should be better for Black.}) 14. Kxf2 h3 15. Nxc6 $6 (15. Bg6+ {was the
most critical test, but White still has a tough defensive task after} Kd7 16.
Qc2 (16. Bf5+ Bxf5 17. Nxf5 Qe4 $44) 16... Raf8+) 15... bxc6 16. Qa4 (16. Ke1 {
gets out of any cheapos along the f-file, but Black is still doing well after}
hxg2 17. Rg1 Qh4+ 18. Kd2 Bxe3+ $1 {intending} 19. Kxe3 Qh6+ 20. Kf2 O-O+ 21.
Ke1 Qh3 $17) 16... O-O+ 17. Kg3 {I don't think White has any defence here. The
king comes out into the open which leaves it vulnerable to attack from Black's
forces, but moving it onto the back rank doesn't help matters either.} (17. Ke1
hxg2 18. Rg1 Qh4+) 17... Bxe2 18. Bxe2 Bxe3 19. Bf3 hxg2 20. Bxg2 Bf2+ 21. Kh3
d4 0-1